How to Remove Scratches from Your Car's Paintwork
Share
Scratches on your car's paint can be a real eyesore and, if left untreated, can lead to more significant issues like rust. Fortunately, many scratches can be repaired at home with the right tools and techniques. In this guide, we'll walk you through the steps to remove scratches from your car's paintwork, helping you restore your vehicle's appearance.
Understanding Types of Scratches
Before diving into the scratch removal process, it's essential to identify the type of scratch you're dealing with. Scratches generally fall into three categories:
1. Clear Coat Scratches: These are the most common and affect only the top layer of your car's paint. They're usually caused by minor incidents like brushing against a bush or using a dirty cloth during washing.
2. Paint Scratches: These scratches go deeper than the clear coat and damage the actual paint layer. They may occur from more significant impacts or scrapes.
3. Primer Scratches: The deepest scratches, reaching down to the primer or bare metal. These require more intensive repair.
Tools and Materials Needed
Step-by-Step Scratch Removal Process
1. Clean the Area
Start by thoroughly washing the scratched area and the surrounding surface. Use a mild car shampoo to remove any dirt and debris, which could cause further scratching during the repair process. Dry the area completely with a microfiber cloth.
2. Assess the Depth of the Scratch
Run your fingernail across the scratch. If your nail catches, the scratch is likely deeper than the clear coat and may require more intensive treatment.
3. Mask Off the Area
For deeper scratches, use masking tape to protect the areas around the scratch. This will help you focus on the affected area without damaging the surrounding paint.
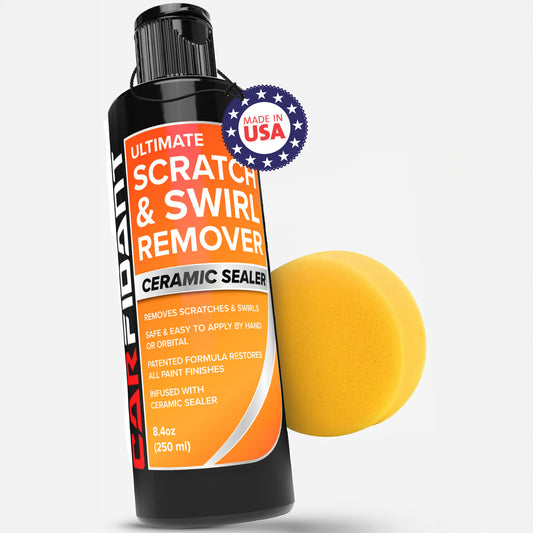
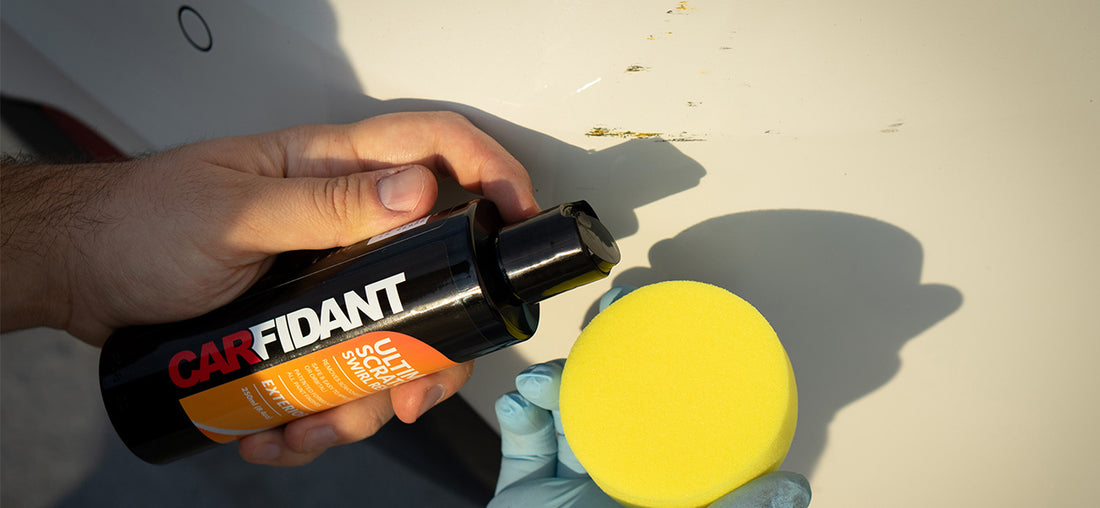
4. Apply Carfidant Scratch and Swirl Remover
Shake the Carfidant Scratch and Swirl Remover bottle well. Apply a small amount of the product onto a buffer pad. Gently rub the product into the scratch using a circular motion, applying moderate pressure. Work on one small section at a time to ensure even application.
5. Buff the Area
After applying the scratch remover, use a clean, dry microfiber cloth to buff the area. This step helps to remove any excess product and restores the shine to your car's paint. For deeper scratches, you may need to repeat this process several times.
Tips for Preventing Future Scratches
Conclusion
Removing scratches from your car's paintwork can be a simple DIY project with the right products and techniques. By following these steps, you can restore your car's appearance and maintain its value. Remember, regular maintenance and using quality products like Carfidant Scratch and Swirl Remover can help keep your car looking its best.
Understanding Types of Scratches
Before diving into the scratch removal process, it's essential to identify the type of scratch you're dealing with. Scratches generally fall into three categories:
1. Clear Coat Scratches: These are the most common and affect only the top layer of your car's paint. They're usually caused by minor incidents like brushing against a bush or using a dirty cloth during washing.
2. Paint Scratches: These scratches go deeper than the clear coat and damage the actual paint layer. They may occur from more significant impacts or scrapes.
3. Primer Scratches: The deepest scratches, reaching down to the primer or bare metal. These require more intensive repair.
Tools and Materials Needed
- Carfidant Scratch and Swirl Remover
- Microfiber cloths
- Buffer pad
- Polishing compound (if needed)
Step-by-Step Scratch Removal Process
1. Clean the Area
Start by thoroughly washing the scratched area and the surrounding surface. Use a mild car shampoo to remove any dirt and debris, which could cause further scratching during the repair process. Dry the area completely with a microfiber cloth.
2. Assess the Depth of the Scratch
Run your fingernail across the scratch. If your nail catches, the scratch is likely deeper than the clear coat and may require more intensive treatment.
3. Mask Off the Area
For deeper scratches, use masking tape to protect the areas around the scratch. This will help you focus on the affected area without damaging the surrounding paint.
4. Apply Carfidant Scratch and Swirl Remover
Shake the Carfidant Scratch and Swirl Remover bottle well. Apply a small amount of the product onto a buffer pad. Gently rub the product into the scratch using a circular motion, applying moderate pressure. Work on one small section at a time to ensure even application.
5. Buff the Area
After applying the scratch remover, use a clean, dry microfiber cloth to buff the area. This step helps to remove any excess product and restores the shine to your car's paint. For deeper scratches, you may need to repeat this process several times.
Tips for Preventing Future Scratches
- Regularly Wash Your Car: Dirt and debris can cause scratches, so keeping your car clean helps prevent them.
- Use High-Quality Cleaning Materials: Always use microfiber cloths and soft sponges for washing and drying your car.
- Apply a Paint Sealant: A good sealant adds an extra layer of protection to your car's paint, helping to prevent scratches.
Conclusion
Removing scratches from your car's paintwork can be a simple DIY project with the right products and techniques. By following these steps, you can restore your car's appearance and maintain its value. Remember, regular maintenance and using quality products like Carfidant Scratch and Swirl Remover can help keep your car looking its best.